Using Kaltura in Canvas
- How do I use Kaltura in Canvas?
- My Media
- Media Gallery
- How do I create an assignment for which students can submit videos?
- I'm a lecturer: How do I create, submit, and grade video assignments?
- I am a student: what can I do with Kaltura in Canvas?
- I am a student: how do I submit a video for a Canvas assignment?
- I am a student: how do I submit a video response to a Discussion?
- I am neither a lecturer nor a student: can I also use Kaltura?
How do I use Kaltura in Canvas?
Canvas allows users to upload video files to Kaltura. Uploaded files can be assigned descriptions and labels/tags and included in a course.
To do so, you will need to use one of the following features in a Canvas course:
- My Media
- Media Gallery
My Media is linked to specific users and can be used to upload and manage your own videos. Media Gallery is linked to specific courses and shows all videos added to the Media Gallery by lecturers and/or students with access rights for the relevant Canvas course.
My Media
At My Media you can upload and manage your own video files. Media content in My Media can be published in the Media Gallery of a Canvas course, but can also be added to Canvas sections such as Pages, Assignments, and Discussions. Go to My Media using the link in the Canvas course menu. You will see the Add New button, here you can create and/or add videos to My Media.
Through Add New you can choose between Media Upload, YouTube, Interactive Video, Kaltura Capture and Video Quiz. Detailled information about these options and how to upload videos can be found under Kaltura tools .
Actions
The Actions button appears in several places, in the My Media overview page but also in the menu bar under a specific video. Below an explanation of the menu options.
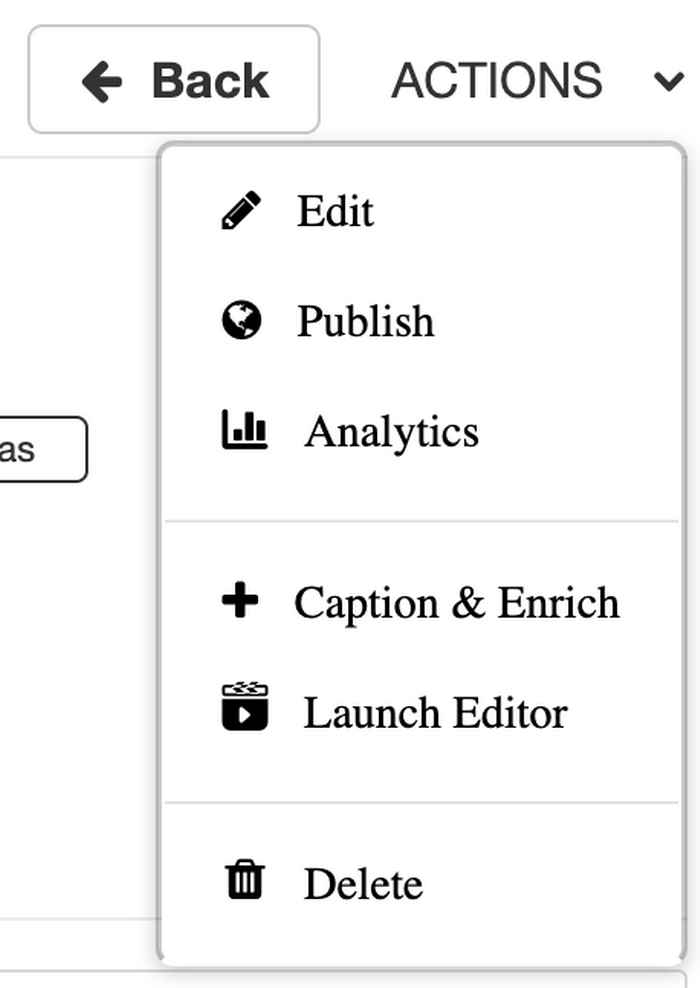
Edit
Below is a number of options for editing your (own) videos, including:
- Details: add a description and/or meta tags to the video.
- Publish: publish the video in a course.
- Options: adjust settings for Comments and Clipping.
- Collaboration: transfer ownership of a video, or assign co-editors and co-publishers.
- Thumbnails: upload an image or generate an automatic thumbnail for your video.
- Downloads: select the formats in which a video can be downloaded. A separate Download button will appear under your video. Please note that you can only download videos that you own. Others can never download videos that you are the owner of.
- Captions: add caption files for subtitles.
- Attachments: here you can add any attachments to the video.
- Timeline: add Chapters and/or Powerpoint Slides at specific points in your video.
- Replace Media: replace the file while maintaining the link, tags, description, etc.
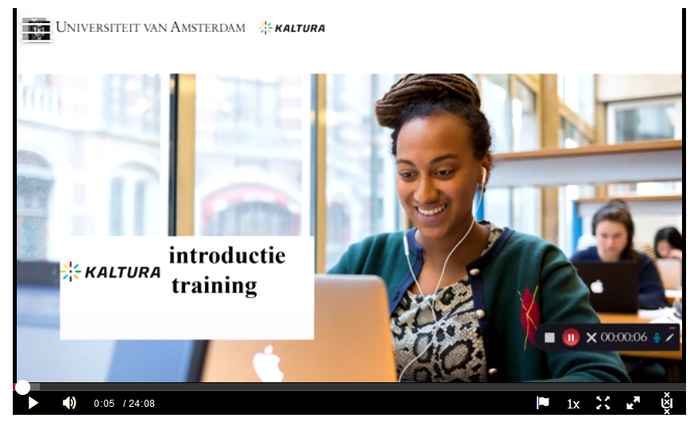
Watch this video for more information on editing videos.
Publish
Videos can be published in a course via the Media Gallery. Everyone in the Media Gallery of a course (including students) can view the video. In Canvas you can do this in the following way:
- Go to My Media and select one or more videos.
- Click on Actions and choose Publish.
- Change the video from Private to Published. Then select the box(es) in which you want to publish the video.
- Click on Save. The video is immediately visible to all students and instructors who have access to the course's respective Media Gallery.
Watch this video for more information on publishing videos.
Analytics
Analytics allows you to see how your students view your video. For example, you can find out how often a video is viewed and how long students keep watching. Viewing behavior can be viewed per time period, and you can compare time periods with each other. This allows you to evaluate the video and possibly optimize it. For a detailed description see Kaltura Analytics or watch this video.
Caption & Enrich
Under Caption & Enrich, you can give the video automatically generated subtitles. You can do this in English and Dutch, translating is not possible. You can edit these subtitles yourself via Caption & Enrich > Existing Requests > pencil icon or via Actions > Edit > Captions.
Launch Editor
You'll also find the separate Launch Editor button here. In the Editor you can edit your video by:
- Video Quiz: add questions to yourvideo.
- Video Editor: cut out parts of your video.
- Hotspots: insert a text or link that redirects viewers to a web page
For more information on what's possible in Launch Editor, watch this video.
Delete
You can delete your own videos by using Delete.
- Go to My Media, and select the video you would like to delete.
- Click on Actions and select Delete.
NOTE: Published videos cannot be deleted as long as they are set to Published. An error message will appear. Videos must first be set to Private (see the heading Publish).
Media Gallery
Media Gallery is a collection place of videos within a Canvas course. Here, instructors and/or students can post videos within a course.
Publishing videos in the Media Gallery
To post a video within the Media Gallery of a course:
- Go to My Media and select the video(s) you want to publish.
- Click on Actions and select Publish.
- Select the course(s) in which you want to publish the video.
- Click on Save.
As an instructor, if you want to approve or disapprove videos that students post in the Media Gallery before they are published, you can check the Moderate content option via Edit in the Media Gallery.
If you have Moderate content checked in the Media Gallery of your Canvas course, then student media will not be visible immediately. The videos will be set to Pending. Approve a video for publication by clicking the Pending tab, and clicking Approved. Click Reject if you want to disapprove the video.
Playlists
Kaltura in Canvas supports the creation of Playlists. You can add specific videos that are in the Media Gallery to a Playlist. This allows you, the instructor, to determine the order in which videos are presented to the students. Playlists appear on the first tab of the Media Gallery: Home. Playlists can also be published to various sections (Pages, Discussions, Announcements, etc.) of the Canvas course. This can be done through the text editor found in each text box in a Canvas course.
Creating a Playlist:
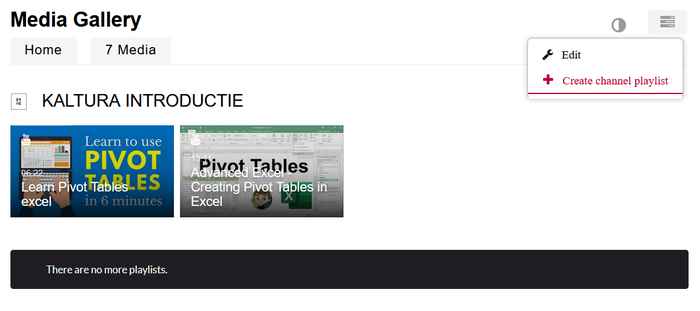
- Click the gray button at the top right of the Media Gallery, and choose Create Channel Playlist.
- In the next screen, enter a name for your playlist.
- In the Edit Playlist screen, then add the videos from the Media Gallery in the order you want to present them.
Once you have saved the playlist, it will be presented on the first tab (Home) of the Media Gallery. With multiple Playlists on the Home tab, you can arrange them, by going to Media Gallery > Edit.

How do I create an assignment for which students can submit videos?
It might be interesting to have students use Kaltura for a Canvas video assignment. They can also use the various Kaltura tools, such as My Media and Kaltura Capture, to manage and create their own videos.
Follow the steps below:
- Go to Assignments in your Canvas course and click on Add Assignment.
- Enter a name in the Assignment Name text box.
- Enter instructions for your students in the large text box.
- Use the text editor to add images, text, links, and/or media to your instructions.
- Enter the highest number of available points for the assignment in the Points text box.
- Go to the Submission Type menu and select Online.
- Select Text Entry under Online Entry Options.
- Specify the due date in Due date under Assign to.
- Select the dates from and until which the assignment will be available under Available from and Until.
- Click on Save & Publish, or click on Save if you do not want to publish the assignment at this time.
- You can also click on the +Rubric button to add a rubric.
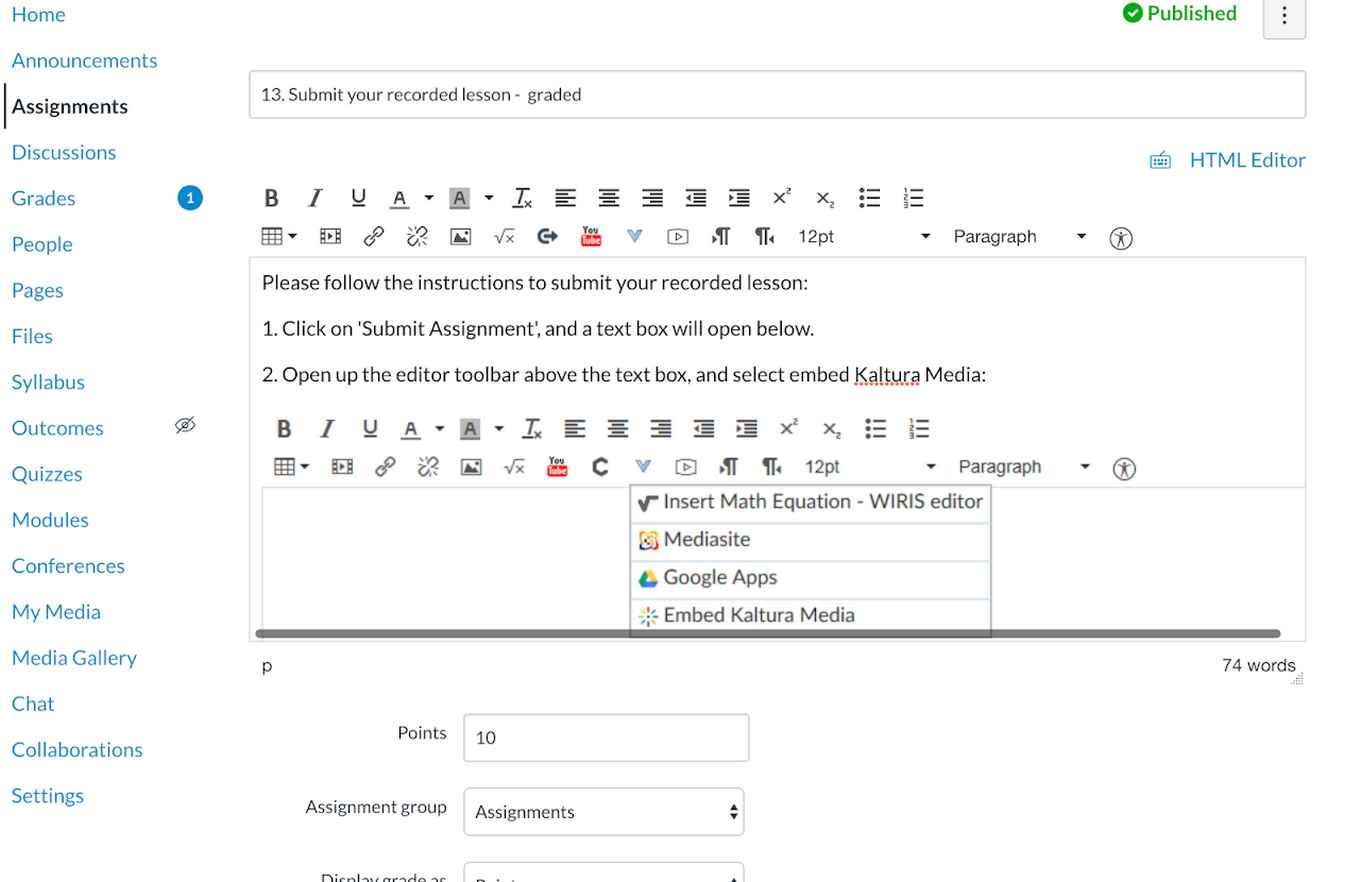
Select the Text Entry option to allow students to submit videos for the assignment through the text editor.
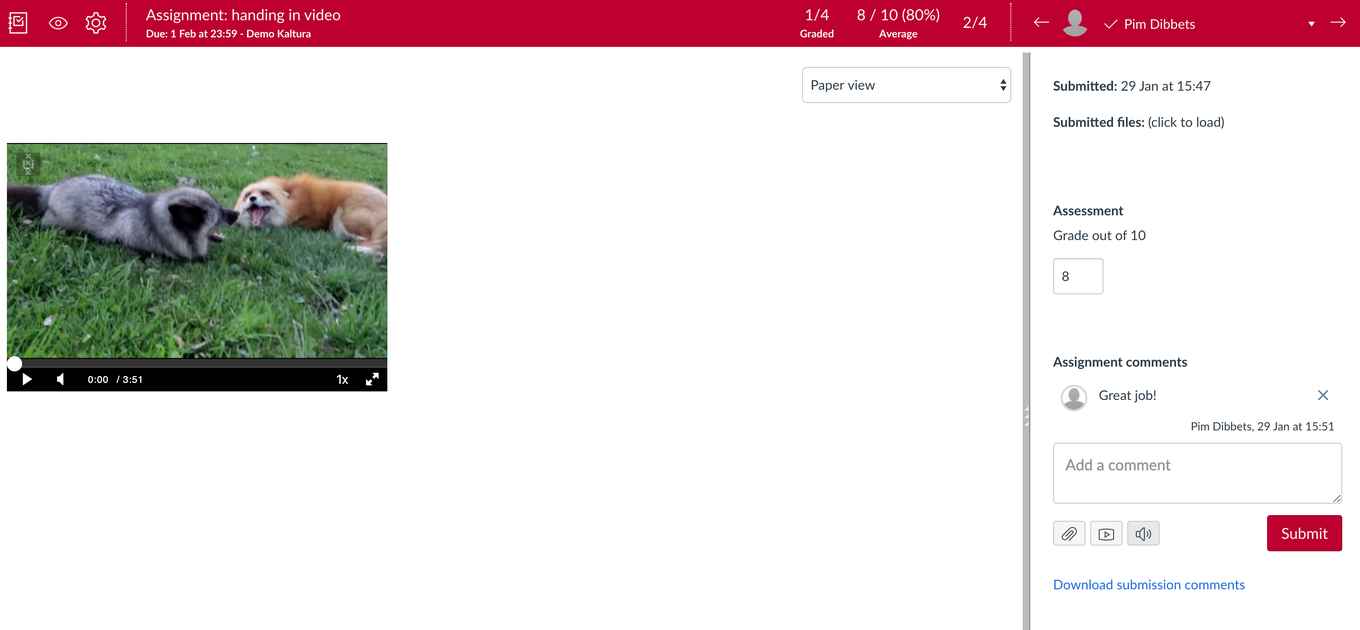
Once your students have submitted their videos, you can use the Canvas SpeedGrader tool to view each student’s video and any comments they have added. Use the SpeedGrader tool to quickly preview the video, rate it and add any comments for your students. Students have the option of resubmitting their videos. Multiple versions will then be visible to the lecturer, who will decide which one is valid.
I'm a lecturer: How do I create, submit, and grade video assignments?
- For a student to submit video content in a Course, the instructor creates an Assignment and under Submission Type chooses the Online > Text Entry option.
- When you choose this Text Entry option, students can submit videos via the text editor on the Assignment in the text editor > at the 'More external tools' icon.
- In the 'SpeedGrader' tool, the submitted videos can be graded.
- After submission the student cannot change, delete or cancel the submission. However, a student can resubmit a video file if necessary.
The screenshot below depicts the above description.
- Choose the video you want to submit (choose Embed).
- The video is now added to the text box of your submission. Add text (if you want to), and choose Submit Assignment to hand in the assignment.
I am a student: what can I do with Kaltura in Canvas?
Students can also add their media through My Media and the Media Gallery in the Canvas environment.
I am a student: how do I submit a video for a Canvas assignment?
If you need to upload a video or sound file to Canvas in order to submit your assignment, follow these two steps:
1. Upload the media file to Kaltura via My Media. For details watch this video.
2. After you have uploaded the video to My Media, you can start submitting it. You do this by using the plug icon and select Submit video in the text editor of the text box. In detail this goes as follows:
- Go to Assignments in the course and select the name of the relevant assignment.
- Select Submit Assignment. A text box with a text editor in the upper section will now appear.
- Type text into the white editor box; when you arrived to the spot where you want to add the video, click on the plug icon and choose View all.
- A new window will pop up. Select Submit video.
- Search for the right video and click on Embed.
- Click on Submit Assignment when you have finished.
Watch this video for a screencast on submitting a video to a Canvas Assignment.

I am a student: how do I submit a video response to a Discussion?
You can add Kaltura video’s in each section in Canvas where is a text editor.
- In the text editor, navigate to the plug icon like described above.
- Click on the green button Share video.
- Find the video you would like to share and choose Embed.
Save the Canvas page.
I am neither a lecturer nor a student: can I also use Kaltura?
If you are neither a lecturer nor a student, but would still like to post video material using Kaltura, you can do so at video.uva.nl.
Naturally, this portal can also be used by students and lecturers.