Kaltura Capture
What is Kaltura Capture?
In addition to Express Capture, Kaltura also offers Kaltura Capture. This useful Kaltura feature allows users to create webcam recordings, screenshots, PowerPoint presentation recordings and audio recordings, which can optionally be combined to create multi-stream videos.
The Kaltura Capture programme can be accessed via My Media > Kaltura Capture. Kaltura Capture is a desktop recording programme that is installed locally on your computer. Once you have downloaded the software to your computer and completed the installation process, you will be able to create videos and upload them to Kaltura.
The software is intended for UvA computer workstations and is available from the UvA Software Center. Watch this video to learn more about Kaltura Capture.
How do I download Kaltura Capture?
- Select My Media in the Canvas course menu, click on Add New and select Kaltura Capture.
- You will now be prompted to choose between Windows and Mac. Click on the appropriate link to start the download.
- Open the file on your computer and install Kaltura Capture (select Run).
- You must now return to the Kaltura web page where you downloaded the software in order to launch the programme. Click on the Back button in your browser.
- Now click on Add New again, followed by Kaltura Capture to launch the programme.
How do I record a screencast or PowerPoint presentation using Kaltura Capture?
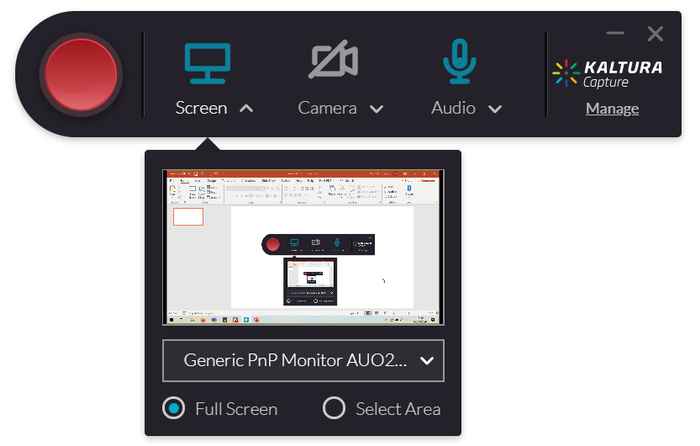
To make a basic screen recording without the webcam, click on Screen as shown below.
The easy-to-use Screen Recording feature also allows you to record a PowerPoint presentation on screen. (You can also add a webcam recording – see How do I record a multi-stream video?)
Carry out the following steps to record a PowerPoint presentation with a voice-over:
- Make sure to have your PowerPoint presentation ready on screen.
- Select both Screen and Audio in Kaltura Capture. Screen offers both a Full Screen and Select Area option. To record a PowerPoint presentation, select Full Screen.
- Start your screen recording by clicking on the big red button.
- You must always select the Slideshow mode in PowerPoint when recording a PowerPoint presentation. Do this now.
- You can now click through the PowerPoint slides while making your screen and audio recording.
When you record a PowerPoint presentation in this way, the PowerPoint slides will appear as Chapters in the finished video and can be found in the video menu on the left.
The Control Settings Toolbar will appear in the lower right section of the screen during screen recordings. Select the Draw option (pencil icon) to highlight or mark parts of the presentation.
A preview will appear as soon as you stop the recording.
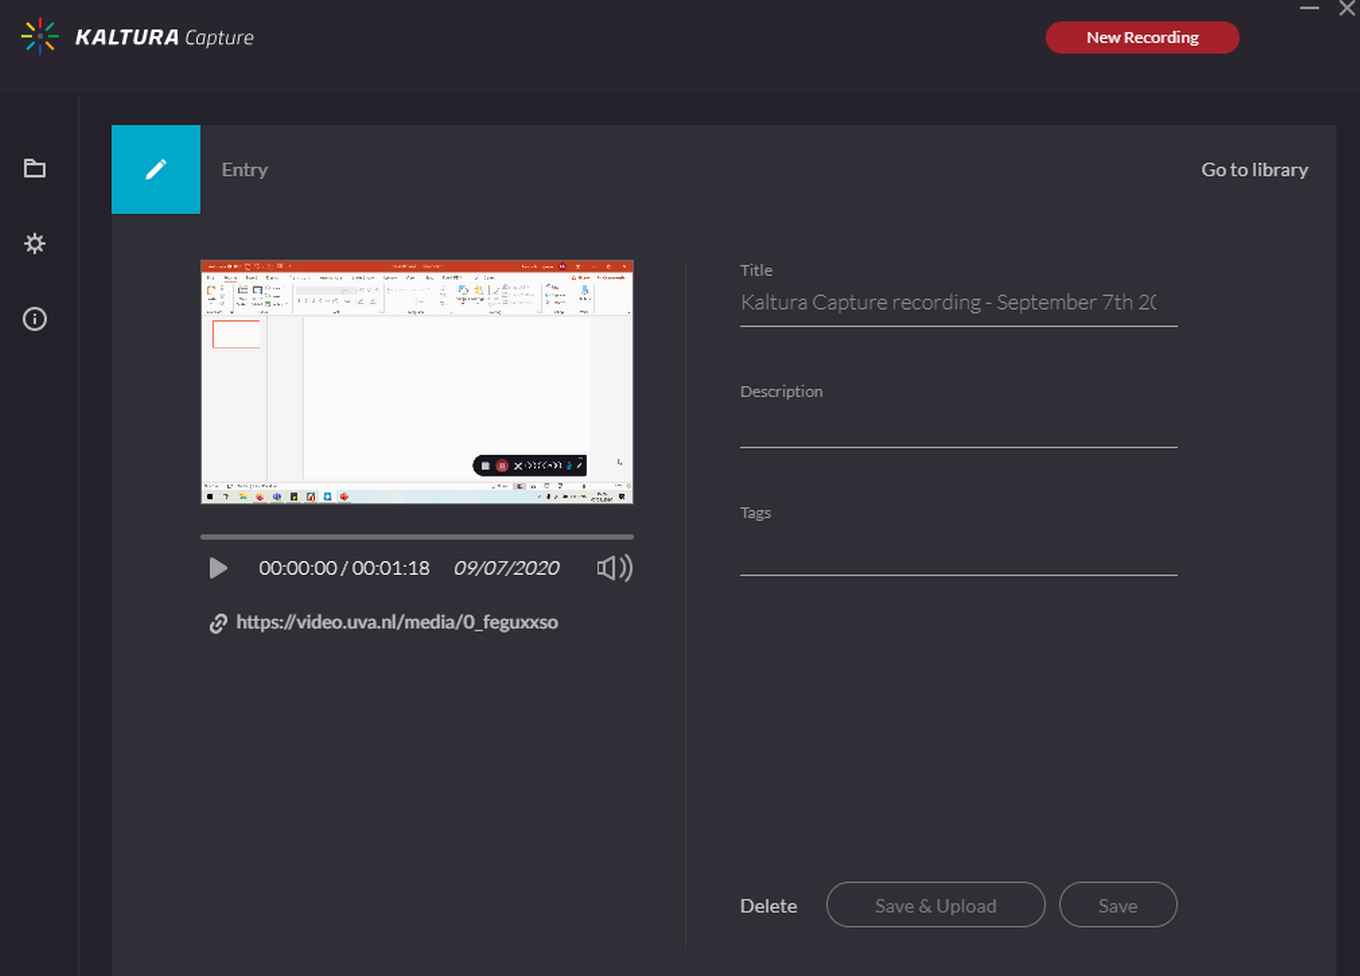
You can edit the Title of your video recording and add a Description and Tags. You can adjust various quality settings under Settings in the menu on the left.
When you are done, click Save & Upload on which the video will be uploaded to Canvas. This may take a few minutes. The video will then be found under My Media in Canvas. You can then do further editing on the video online, such as Chop and Trim by choosing Launch Editor from the Actions menu.
Click on Save in Kaltura Capture if you want to upload the video at a later time. The file will then be stored locally on your computer. You should only do this if you are working on your own computer or at a fixed UvA computer workstation.
How do I retrieve a video?
You can search through all your Kaltura Capture recordings on the first Library tab. Videos that still show the Upload option have not been saved to Kaltura yet and are currently stored locally on your computer. To upload them, select the Upload option next to the recording in the list.

By clicking on the name of the video you can edit it first.
All recordings you have uploaded can be found under My Media in Canvas. All recordings you have only saved (using the Save button) can be found on your computer as follows:
On a Windows PC:
- Open File Explorer or Windows Explorer.
- Put the following path in the address bar:
%LOCALAPPDATA%CaptureRecordings - Press Enter.
On a Mac:
- Open the Finder.
- Open the Go menu.
- Choose Go to folder.
- In the address bar, put the following path:
~/Library/Preferences/Kaltura/Capture/Recordings. - Click Go.
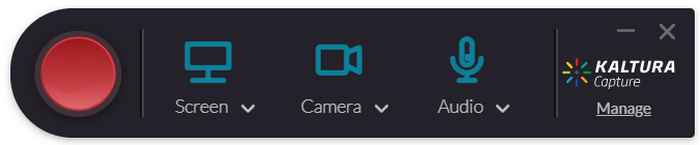
How do I select recording devices in Kaltura Capture?
Click on the Camera icon to activate the webcam and click on the Microphone icon to activate audio.
The drop-down menu will display all detected webcams and/or microphones. Select the webcam – or, in the case of an audio recording, the microphone – you want to use.
How do I record a multi-stream video?
Make sure both Screen and Camera are activated. Click on the red button to start the recording: you will now automatically record the active screen (Screen), yourself (Camera) and audio (Audio): a multi-stream video, in other words. A countdown will appear on screen before the start of the actual recording.
While recording, you are sharing your screen. Once you are done and uploaded the recordings, you will find them under My Media.
Use the Launch Editor option under Actions menu to make any further edits.
Here you can still make edits with the Trim and Chop options on both recordings, the webcam recording and the screen recording.
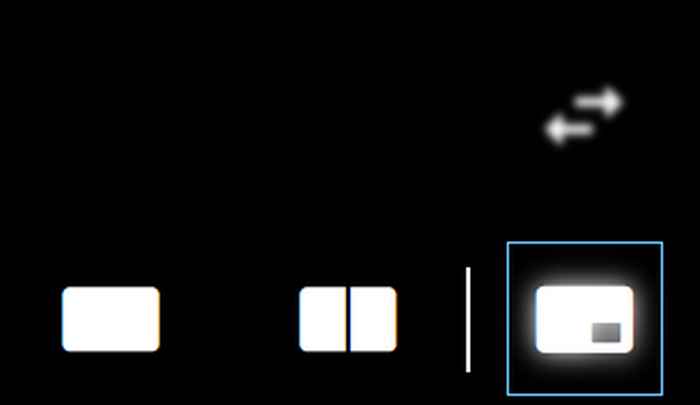
A multi-stream video like this can be viewed in the following ways:
- Picture in Picture;
- Side by Side;
- Single View;
- Toggle View.
To do this, click on the white icons as shown below.
See also this manual from Kaltura: Kaltura Capture - Get Started User Guide.